How To Process/Run Payroll
Learn how to run payroll with PaymentEvolution.
Also known as: Running Payroll.
Applies to: Administrators, Payroll Manager, Canada (en-CA)
Video loading, just a moment.
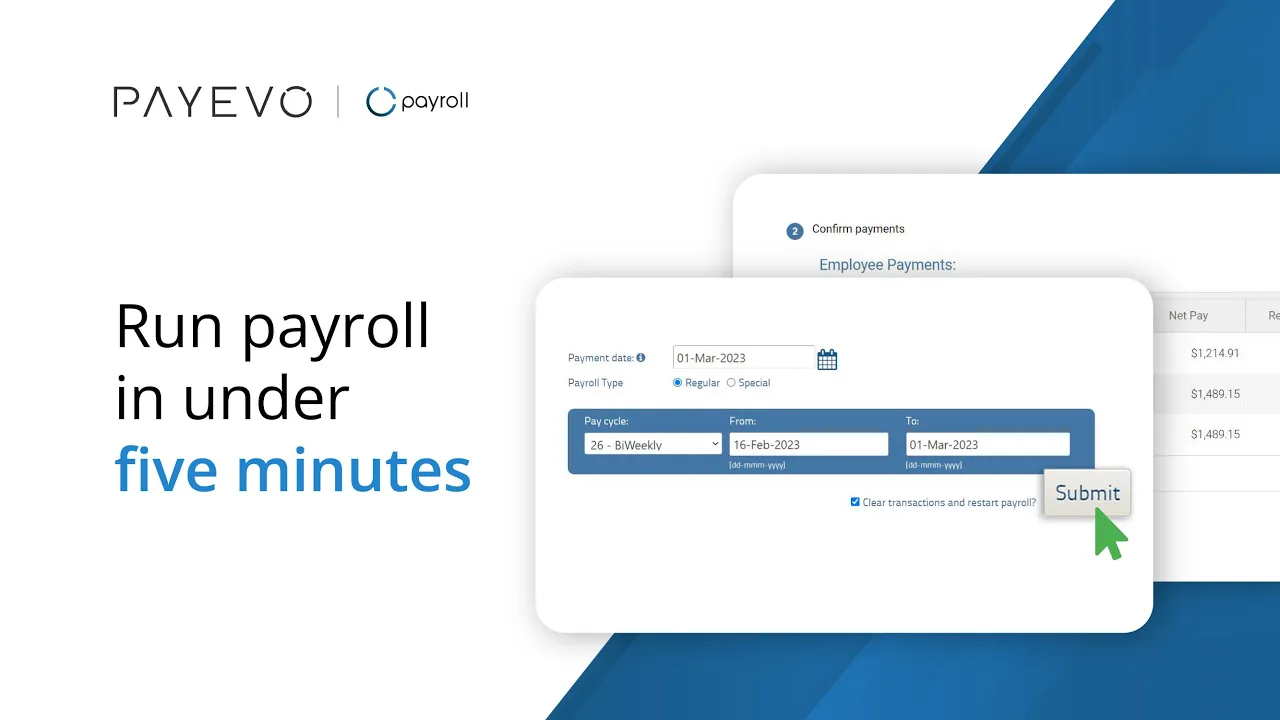
Running payroll is simple in PaymentEvolution. Each step allows you to validate and confirm the data you've entered. If you need to stop partway through a pay run, it's no problem—we save all your work and allow you to come back later to finish the process.
First, ensure you've set your company settings and added your employees.
To run your payroll, follow these simple steps:
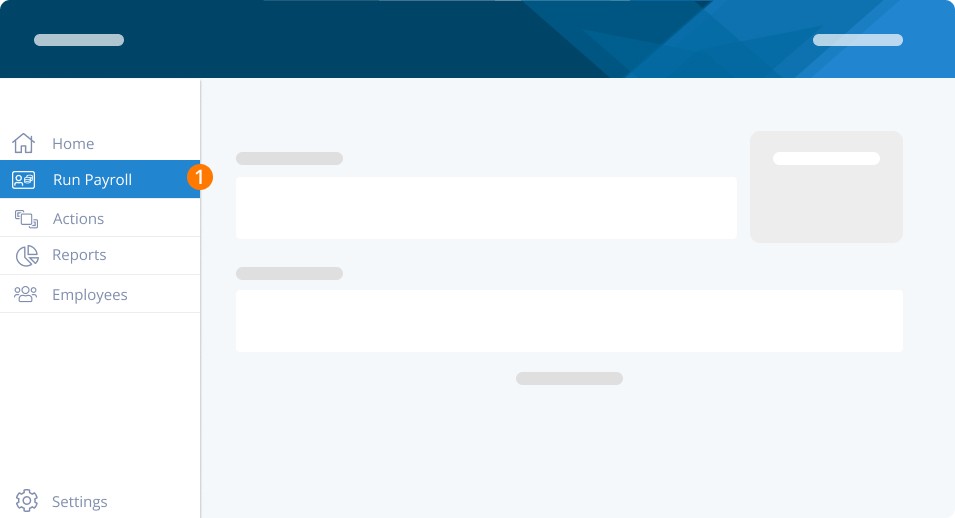
Step 1. In the left-hand menu, click Run Payroll.
Pro-Tip: You may be asked if this is a new remittance period. If your pay date for the pay run you are about to perform falls in your next period, or you prefer to have reports for EACH pay run, you should click YES.
The payroll steps menu bar will appear with each section opening when it is available.
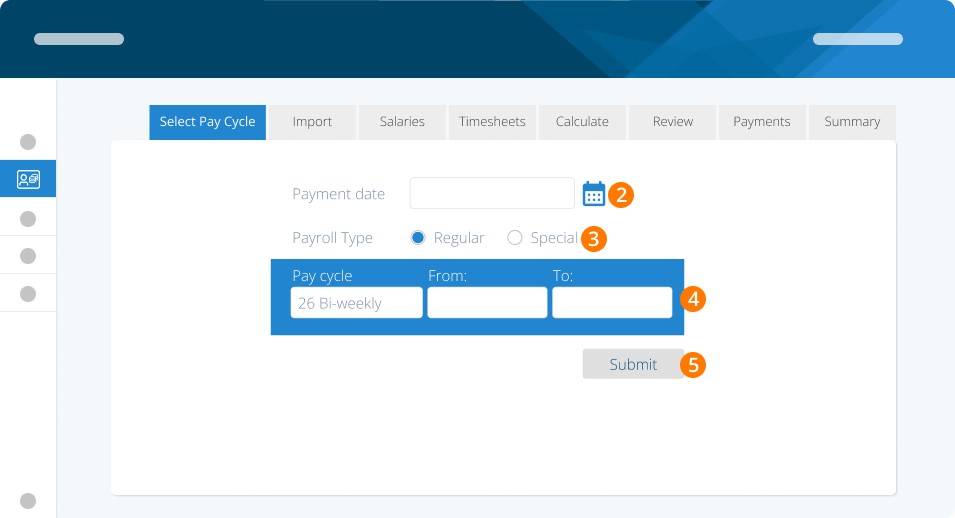
Step 2. Choose the payment date (the date you want your employees to be paid).
Step 3. Choose the payroll type. Depending on your plan, you may see:
Regular: this is your regular pay run period
Special: this is for adding additional items for an employee already processed in a regular run
Manual: this is available on select plans to allow for a negative data entry pay run
Step 4. Select the pay cycle (frequency) and enter your 'from' and 'to' dates for this pay run's work.
Step 5. Click Submit.
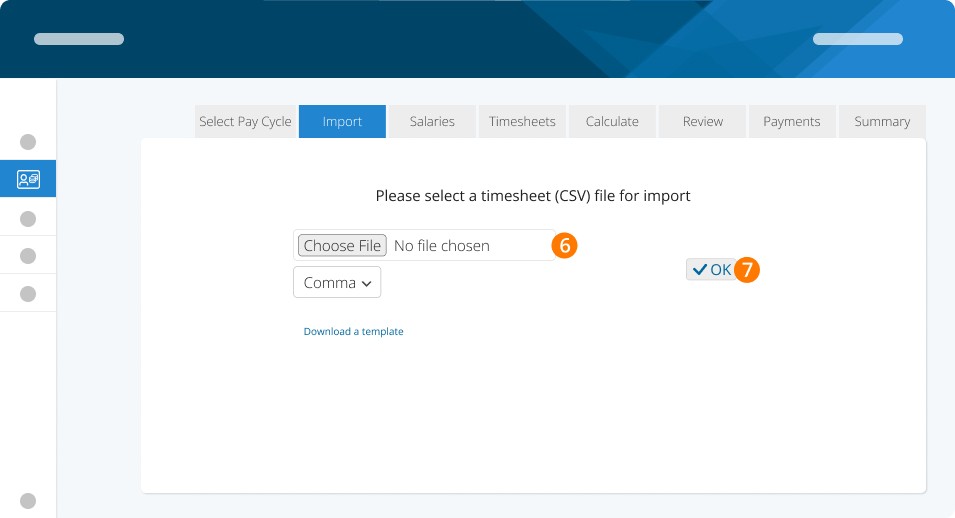
Select plans will give employees access to a CSV timesheet upload. For more information on CSV imports, see here. Contact Us if you would like to learn more about plans that offer this option
Step 6.Choose your CSV file.
Step 7. Click OK
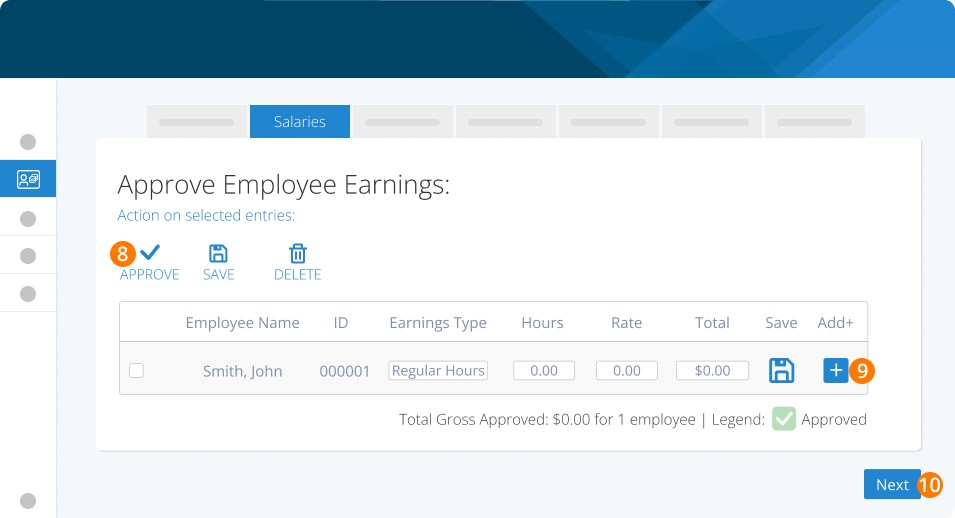
Your list of salaried employees will be displayed next. We will pre-fill the number of hours, pay rate, and total earnings for you. You can make any necessary adjustments.
Step 8. Approve the regular hours by checking the box to the left of the employee's name and clicking approve.
Step 9. You can also add other earnings by clicking the Plus icon next to the employee's name.
Step 10. Click Next.
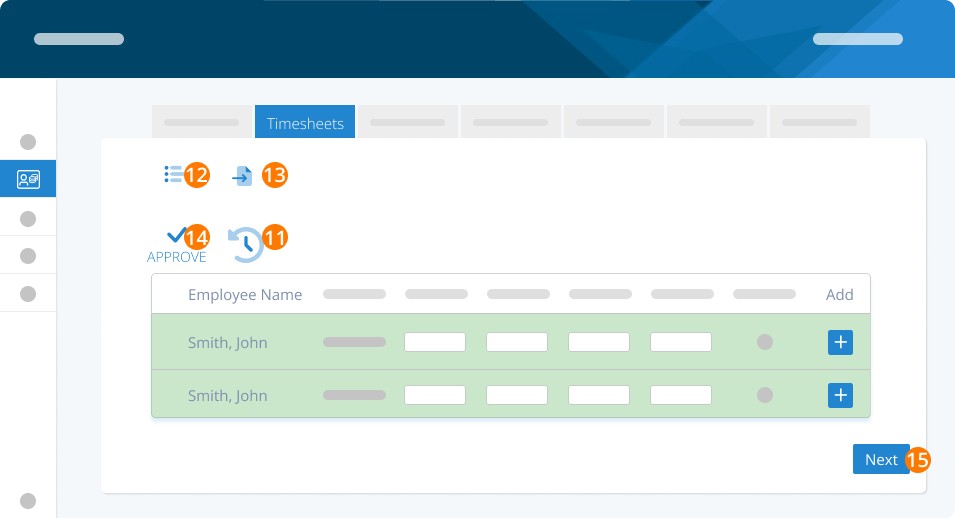
Employees who are time-based (i.e. paid by the hour) will be displayed on this screen. If you are in Bulk Mode (found under SETTINGS>PAYROLL OPTIONS) enter the hours for the entire time period. If you are in Daily Mode we will pre-fill hours for you based on the employees’ average hours per week on their employee profile.
Step 11. To clear all hours, click the "clear" icon.
Step 12. If you haven’t set up your timesheet preference in Payroll Options, you can switch from Daily to Bulk by clicking the Bulk/ Daily icon.
Step 13. If you are integrated with any of our partners for timesheets, you can import your hours by clicking on the Import icon.
Step 14. After entering hours, select the employees you would like to approve for pay by checking the box to the left of each employee's name and clicking Approve at the top.
Step 15. Click Next.
Once you have completed entering wages, hours and other earnings, you will be prompted to choose to calculate using the system defaults or a custom calculation.
Step 16. The system default is appropriate for most pay runs. Click Yes. Use the custom calculations option to turn any specific rules on or off for just this pay run.
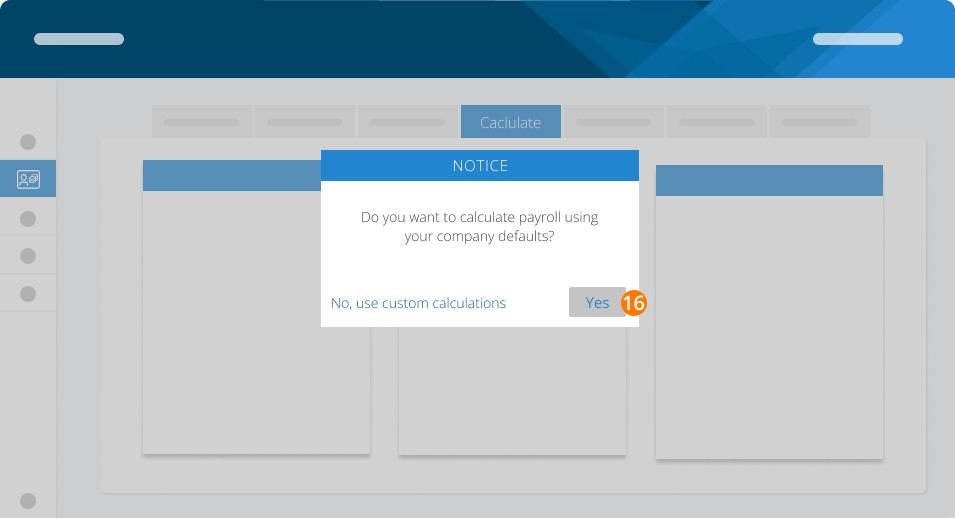
Pro-Tip: If you have benefits or deductions applied to your employees and are running a special run, typically, you would use custom calculations to turn these off. The employee’s pay would already have them added to/subtracted from their regular pay run.
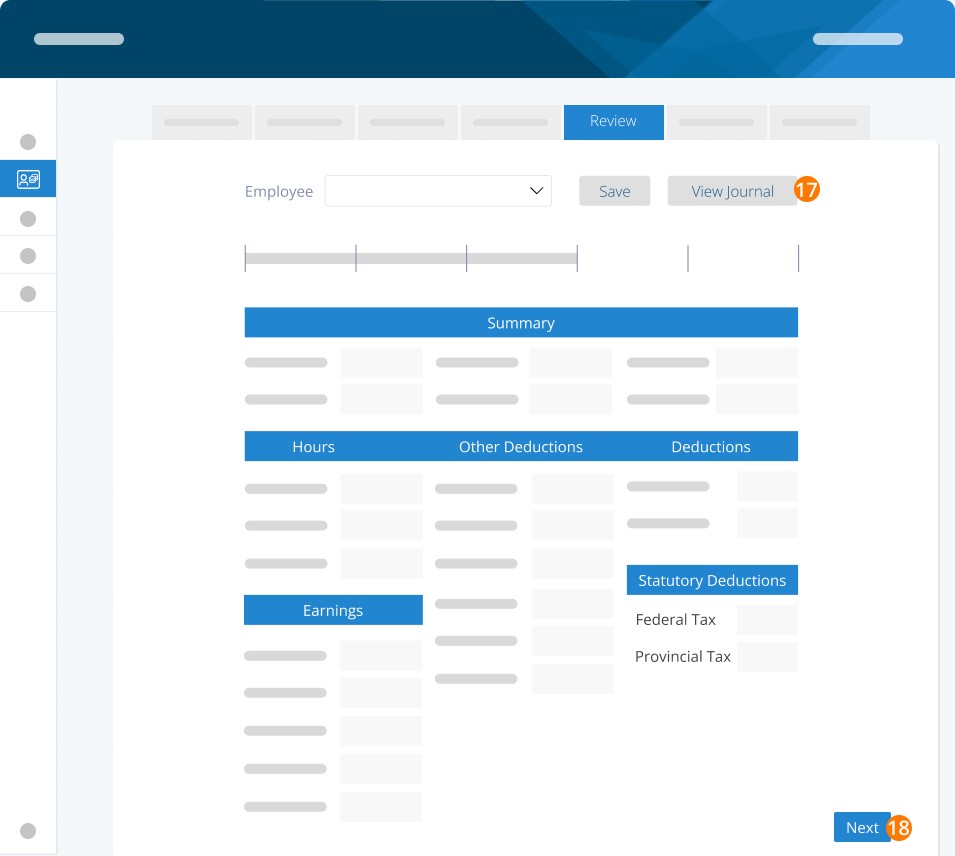
Once the calculations are complete, you can view the results by employee. Using the dropdown box, you'll be able to view an employee's pay slip. You can make manual changes to the employee's pay in certain circumstances. This is not typically recommended but is available. Click Save if you make any manual changes.
Step 17. Use the View Journal button to download a PDF of all employees in this pay run.
Step 18. Click Next.
Pro-Tip: We strongly recommend reviewing all employee amounts before completing your pay run. You can return to any step, pay rule, or employee to make changes. If you make changes outside the pay run, you must calculate again to pull in the new information.
Note: changes to an employee pay rate will NOT change an approved line in salaries/timesheets. Instead, update the line rate in the pay run (after you update the employee) and click SAVE.
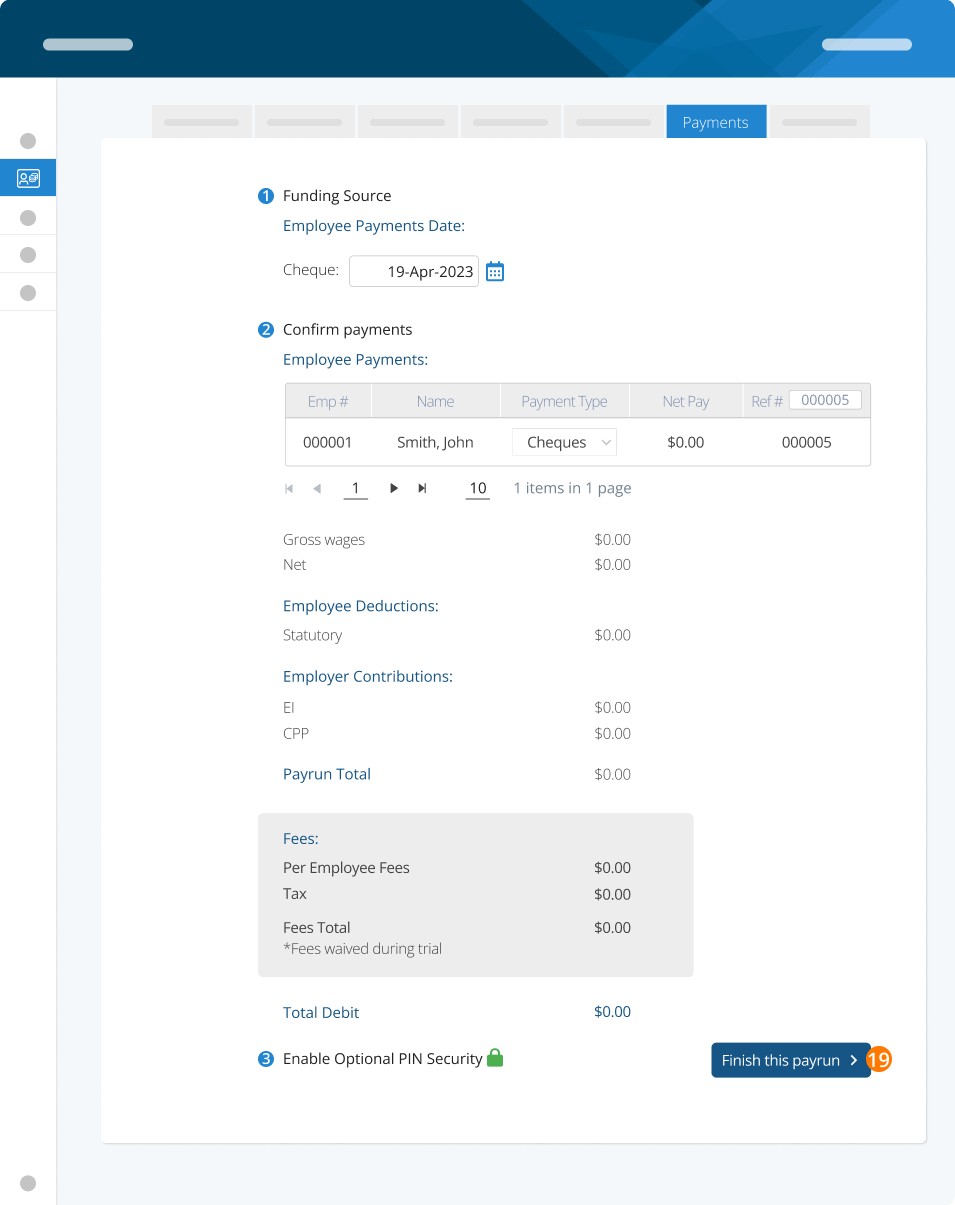
Here, you can process the payments for your employees. If you are processing electronic payments, the system will process them for you. If you pay via cheque, the system will generate a cheque report, which you can use to print cheques on pre-printed cheque stock.
Choose your funding source, confirm payment dates, and switch to an employee payment type (direct deposit/cheque). Review your final amounts and enter your PIN (available on paid plans) or enable it if you choose.
Step 19. Click Finish this pay run.
When using ePay, the authorization screen is the most important for your pay run. It tells you the employee payment date, how the pay run is funded, the amount that will be debited/expected, the debit date/expected date, and bank information. If any of these are not accurate, click Go Back.
Step 20. If everything looks good, click Yes, Authorize.

You can go back to any point in the payroll process and adjust as needed until this point. After you click Yes, Authorize, the pay run is committed and not editable.
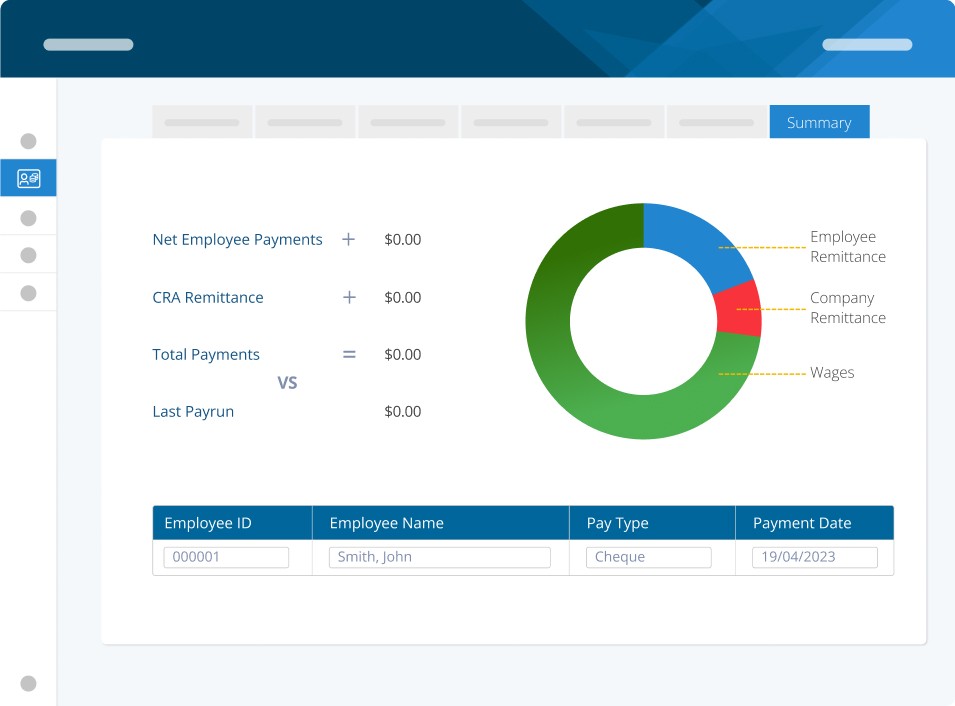
This will show you a summary of your pay run and the employees you have paid. That's it! You've completed your payroll! Congrats!
Related Tasks
Keywords: Settings, New User, Payroll, Running Payroll, How To, How To Run Payroll, Pay Employees, Set Up, Pay
396
Can't find what you are looking for? We can take a more direct look to help resolve your matter — Create Case or Contact Us