Follow these steps to create the appropriate pay rule and apply it to the employee.
Creating the Garnishment Rule
Step 1. Go to Settings > Pay Rules > Deductions > Add New Rule.
Step 2. You will then see a pop-up. Enter a descriptive name such as Alimony or Maintenance (as described on the document you would have received) – this is what the employee will see on their pay slip.
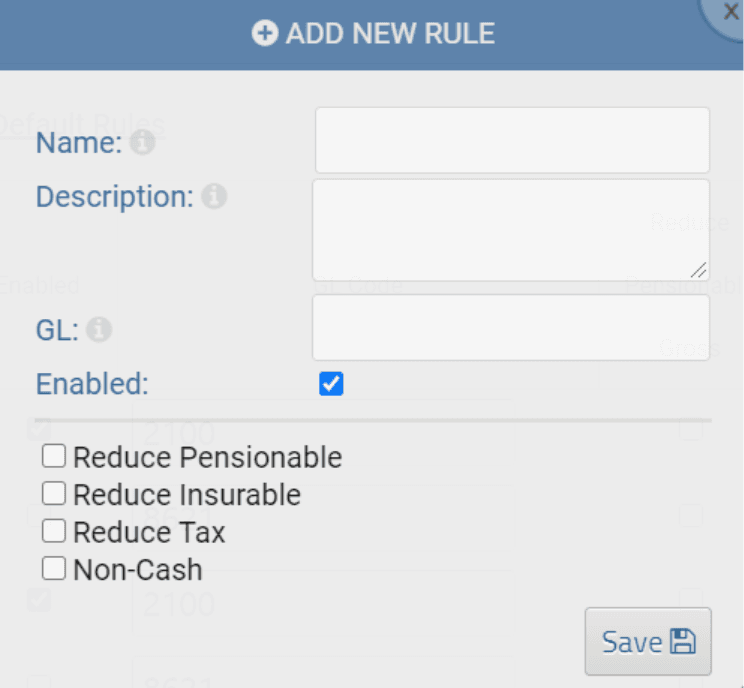
Step 3. If it needs to be remitted to CRA or MRQ as part of your regular taxes, then set the GL code to the same as the particular tax it will be remitted with. If not, then set the GL code to something different. Be sure to Enable it so it runs every pay. Once complete, click Save.
Your rule is now created, and you’re ready to apply it to the employee.
Adding the Garnishment to the Employee
Now that the rule is created, we will need to apply it in the employee’s profile.
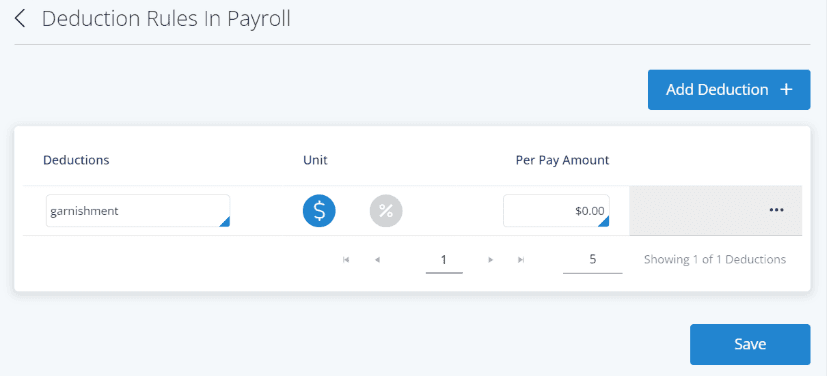
Step 1. Go to Employees > Profile > Payroll > Deductions.
Step 2. Select Add Deduction + and choose the rule you created.
Step 3. Select the $ option. If the amount will vary leave the amount at 0.00. If it is a set amount enter that amount. Once complete, click Save.
If the amount is variable, you will need to modify the value on each pay run.
Applying the Garnishment on Payroll
If the garnishment amount is variable, run payroll as normal and approve their regular hours and earnings. Once you reach the Review tab, click on the employee’s name. This will take you to a screen where you can manually modify certain values for this pay run.
If the garnishment amount is a percentage of their net pay, you will need to take their net pay and manually calculate the amount of the deduction. Enter that amount into the field in place of 0.00 for the Garnishment rule under the ‘Deductions’ section. Finally, click Save and the net pay will update at the top of the page. From here you can finish the pay run as normal.
If the garnishment amount is a fixed amount, it will run as part of your regular calculations. You do not need to make any changes.
Remitting and Reporting the Garnishment
Now that you’ve run it through payroll, you will need to track how much has been deducted to determine how much you’ll need to remit. To do this:
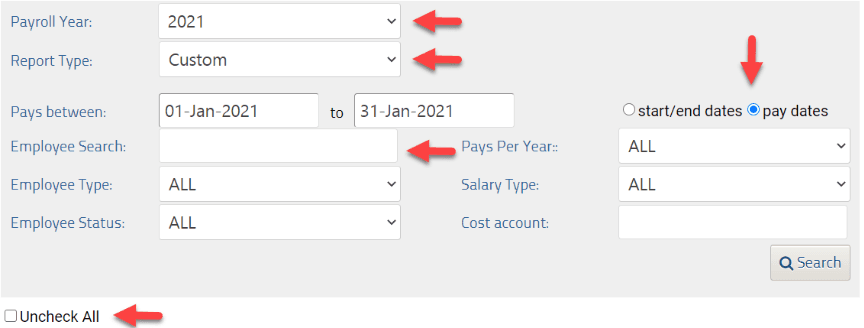
Step 1. Go to Reports > HX >Pay Explorer and enter the following criteria:
Ensure correct year
Report Type: Custom
Set date range
Select Pay Dates
Employee Search: employee’s last name
Select Uncheck all
Step 2. Before clicking Search, find the garnishment from the list of deductions and select it. The report will then generate the amount deducted for the garnishment for the selected period. You can export the report to excel or PDF to keep a record of it.
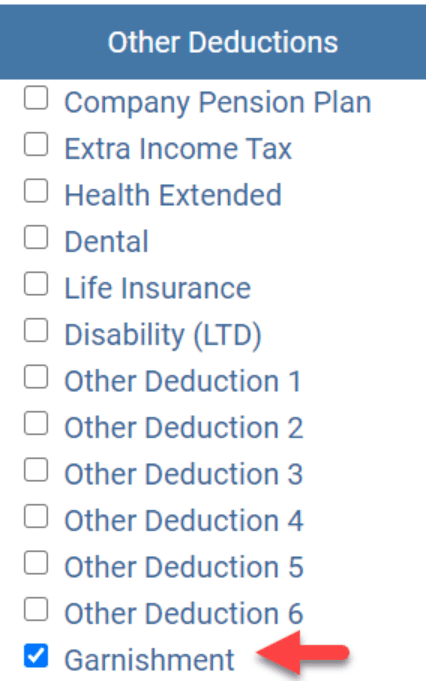
You will then have a report that shows the amount deducted under the Garnishment rule for the specified period. You can then use that to remit the amounts as required.
Note PaymentEvolution only remits items set to the same GL code as Federal or Provincial tax. Any other type of garnishment will remain in the company bank account and will need to be remitted according to the instructions provided by the garnishment office.
Troubleshooting & FAQs
Can PayEvo remit my garnishment on my behalf?
No, PayEvo only remits items set to the same GL code as Federal or Provincial tax. Any other type of garnishment will remain in your bank account (i.e. not deducted by PayEvo) and will need to be remitted according to the instructions provided by the garnishment office.
Keywords: Garnishment, Wage Garnishment, Alimony, Maintenance
396
Can't find what you are looking for? We can take a more direct look to help resolve your matter — Create Case or Contact Us