The following plans include CSV file import for adding team members:
Plan | CSV File Import |
|---|---|
Growth | |
Business Basic | |
Business Plus | ✓ |
Acc Advanced | ✓ |
EVOLV | ✓ |
How to Import
You can import employee data via CSV. Whether you need to add several team members all at once, or you just need to update existing information in your staff profiles, the CSV update method helps cut down on the time to make bulk changes. To get started, make sure the CSV import for employees feature is activated for your account. If you do not see this option, please contact us and we'll help you upgrade to a plan that includes this service.
Step 1. Settings

Step 2. ADD-ONS
Step 3. HR
Step 4. Enable CSV Employee Import
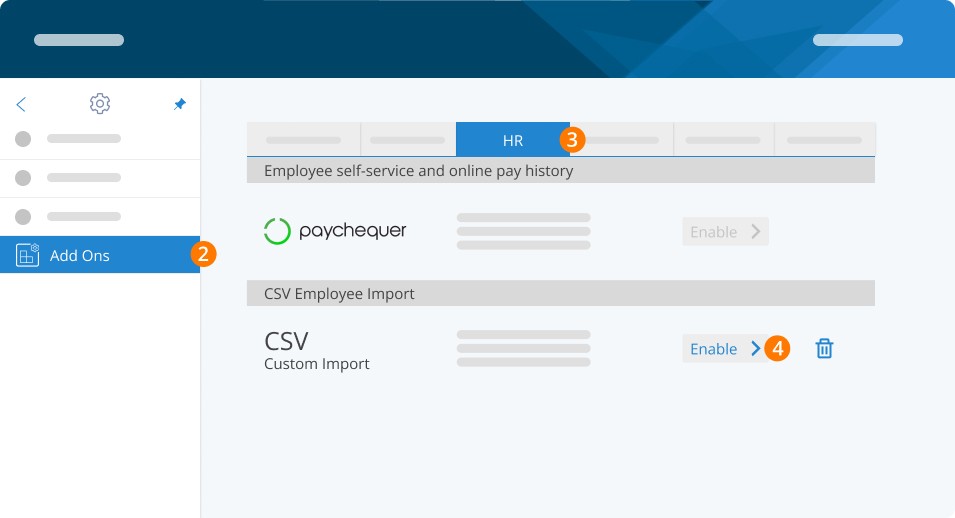
Once enabled, you'll see a new option in your employee list to import. This will permit you to upload a CSV file with any new employees or changes for existing employees. Be sure to use the template at the bottom of this guide or refer to the reference naming conventions (at the end of the article) to ensure your CSV file is formatted correctly to ensure the successful importing of your changes.
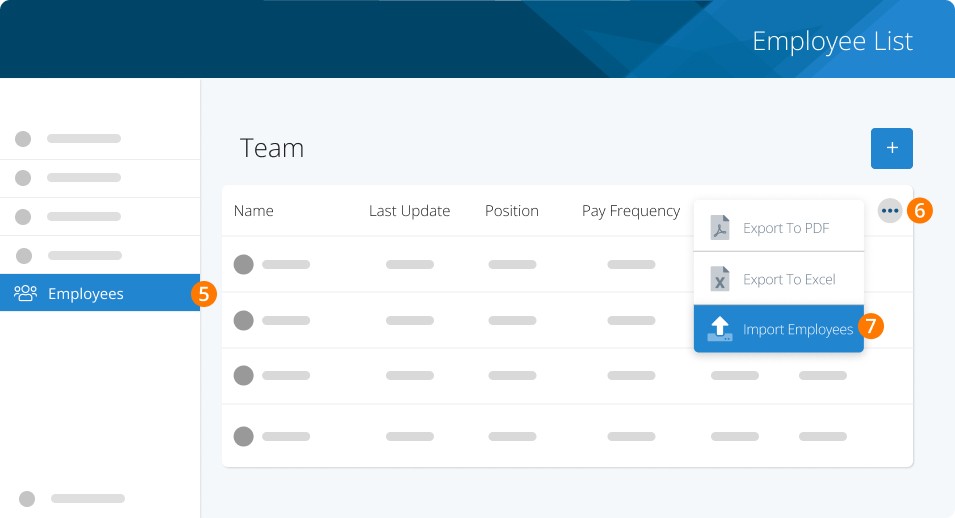
Step 5. Employees
Step 6. Drop-down menu (three dots)
Step 7. Import Employees
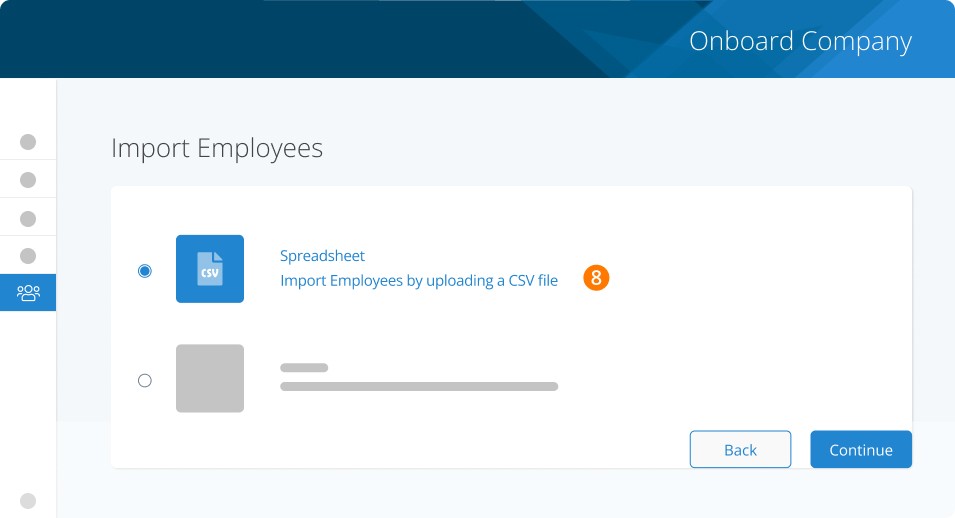
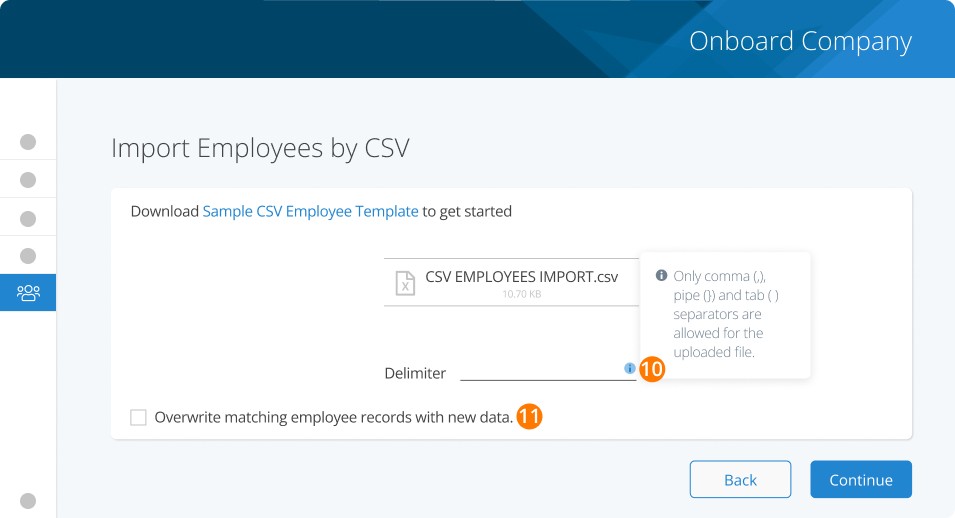
Step 8. Import Employees by uploading a CSV file
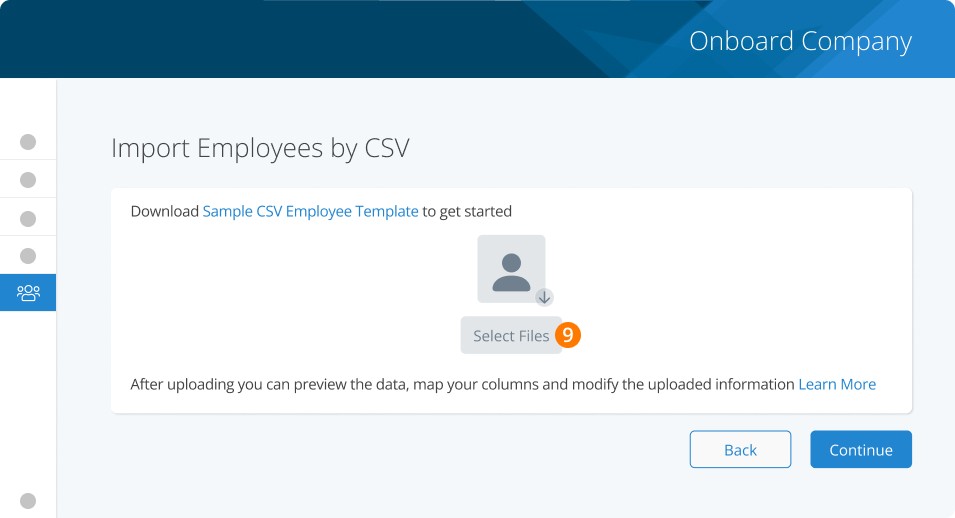
Step 9. Select File to import
Step 10. Select the type of Delimiter used in your file
Step 11. Select the option to update existing records (if necessary)
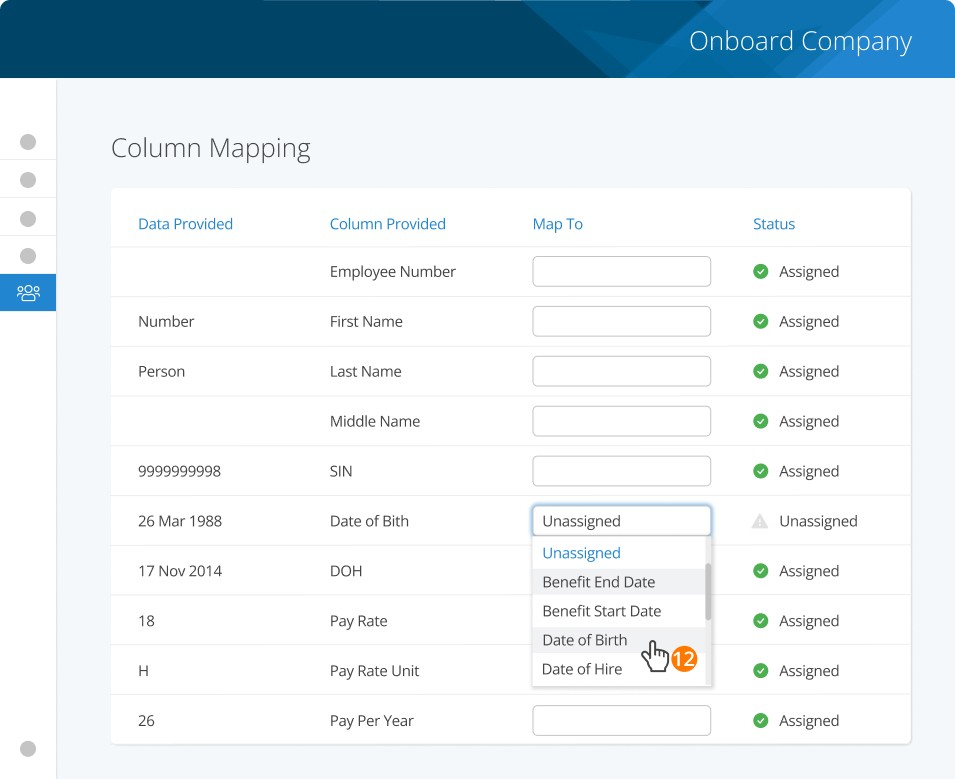
Step 12. Use the mapping tool to match columns
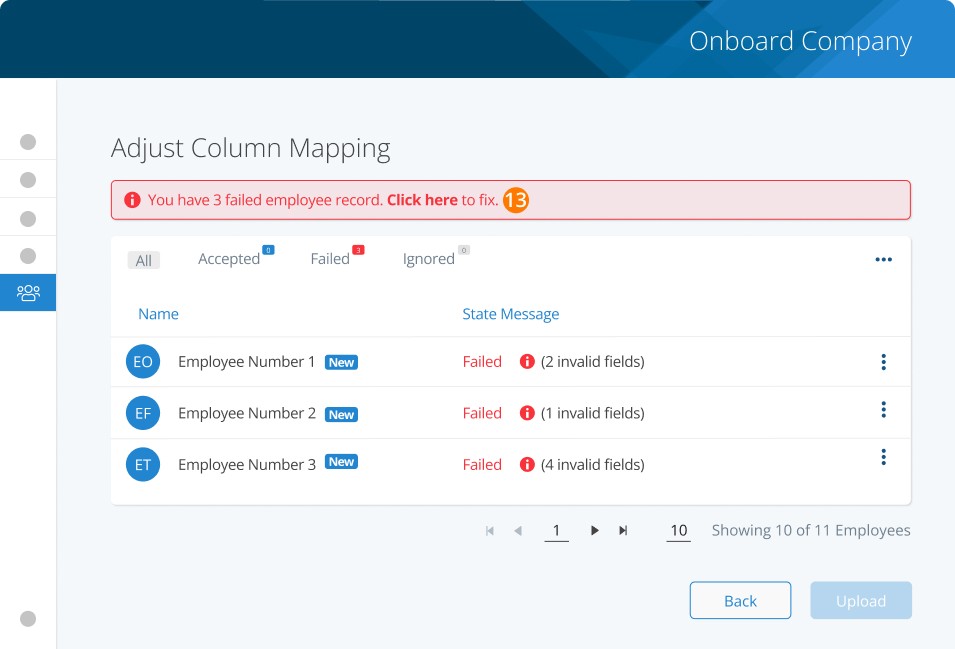
Step 13. Make note of any issues and correct them
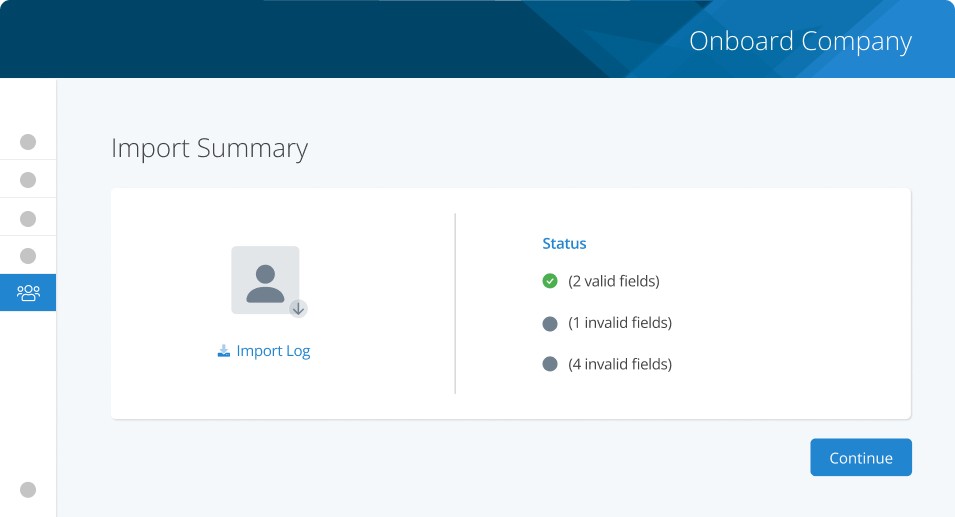
Review the summary to complete the import
Specifications
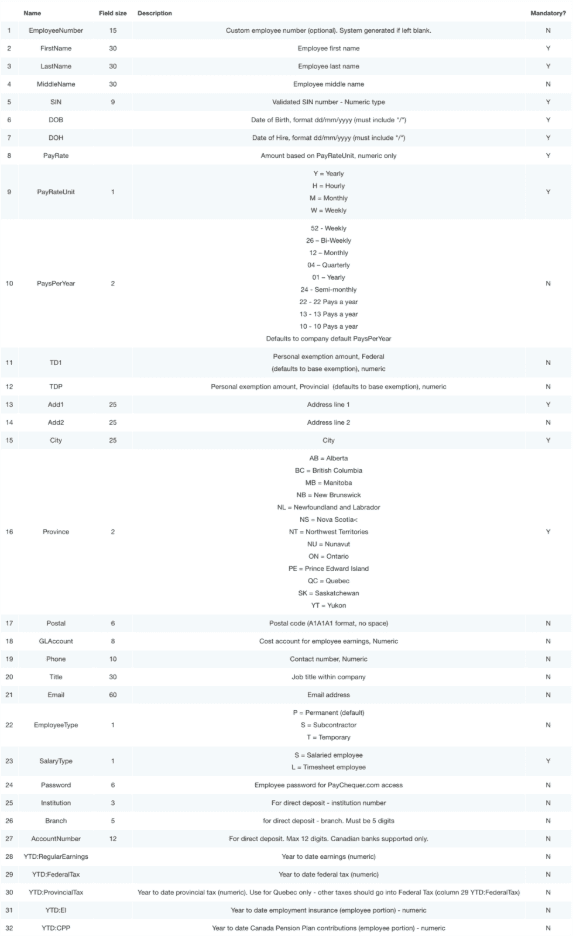
If you have custom earnings codes you need to add the YTD for- go to COMPANY SETTINGS>PAY RULES>EARNINGS. There is a 2-digit number next to your earnings name, this is the YTD:DIGITCODE you would use on the CSV in a new column.
For Example, YTD for Support from the picture below you would create a column with the header YTD:20
Please note, while Microsoft Excel does work with CSVs, we suggest using a true CSV editor to edit/create your CSV files. Excel has a tendency to change the format on the user, which will result in a failed import. There are many free CSV editors available online.
After Importing
Edit any other employee details as needed. You may need to edit fields under Payroll and add any employee access.
You can download a sample CSV file below
Related Attachments (1)
TROUBLESHOOTING
Related questions
Keywords: Adding Team Member, Onboarding, CSV, Bulk Add, Bulk Add Employee
396
Can't find what you are looking for? We can take a more direct look to help resolve your matter — Create Case or Contact Us